Pages

Tuesday, February 28, 2012

Weekend Catch-up

Hello lovely readers!  I’m sorry I’ve been absent for a few days.  But now I’m back with some things to review for you!  I hope you all had a fantastic weekend.  And the good news is, this week is nearly half over J 

Saturday night I went out with my mom and a group of her friends to dinner at Jack’s Urban Eats and then to the movies.  We saw The Vow. 

True to form it was another ultimate Chick Flick.  I was nearly in tears at some points.  I think I have become more sappy in my old age!  I never even used to come close to crying at movies.  The thing that I probably loved most about this movie (apart from the Rachel McAdams/Channing Tatum pairing), was that it was based on a true story.  It really puts so much more meaning behind it when you know it really happened. 

On a different note, I also got some new Essie Nail Polish this weekend. 

The light pink is called Muchi, Muchi and the more coral color is called Cute As A Button.  I love them both.  Muchi, Muchi is a great baby pink color and is not too sheer.  Two coats is perfect.  

And Cute As A Button is such a pretty coral for spring.  It’s bright but not overpowering. 

I haven’t been up to many crafts lately, but I promise that will change.  Hubby and I are taking a few days off from work at the end of the week, and are planning to tackle some house projects during our “staycation”.  I will hopefully also have some more patio pictures for you.  I’ve sorta fallen behind on posting about that.  Sorry!  I will do a Patio DIY catch up post soon.  That’s all for now.  Stay tuned my friends J

Thursday, February 23, 2012

NEW!! Mary Kay Botanicals

I'm so excited to let you guys in on a new Mary Kay product!  This line just came out a couple of days ago and it looks amazing!  I haven't gotten mine yet to try, but for sure when I do, I will be posting a review for you!  

This line is PERFECT for sensitive skin, it's hypoallergenic, and the packaging was even created to be gentle on the planet!  How amazing is that??  Good for your skin, good for the environment!  Double win.

This line comes in 3 different formulas for Dry skin, normal (combo) skin, or oily skin.  It works with your skin type to leave you with balanced and refreshed skin.  

Spring is just around the corner, who thinks its time to switch things up, try something new, and get great looking skin in the mean time?!  Go check in out for yourself!  And if you feel like trying something new, let me be your Mary Kay rep!

Mary Kay has a 100% money back guarantee, so if you try something and don't like it or its just not right for you, send it back and I'll refund you in full!  What have you got to lose?  :-) 

Check out my site and feel free to email me with questions.  

Monday, February 20, 2012

Bedroom Update

This isn't a crafty post, or a DIY post.  I just wanted to show you all a little bit of the bedroom makeover that I started over the weekend.  To give you a better idea of the overall feel and color scheme I'm aiming at.  I went to Target this weekend (most-awesome-store-ever)  and got a few things on super sale!  Yay for amazing things on clearance at Target!  Here is a "before" picture:

The colors were ok enough (browns/beiges).  But they were seeming a little blah if you know what I mean.  Also, notice the ugly not matching red blanket?  That's for Paddington, so that he doesn't get the duvet all dirty when he comes up on the bed.  Also notice the tiny, sad little lamps.  These were somewhat of an impulse buy when the house was first being decorated by moi.  Oh how I wish I had Pinterest back then!

But now, thanks to all you lovely people out there in blog land and in Pinterest land, I've changed my taste and opted for more bright and airy colors.  Here are some "after" pictures:


For the last picture of the lamp, it makes the room look super dark, but I really just wanted to show you the fun texture on the lamp shade.  Aren't these colors so much better?!

I got new gray and white sheets with a fun pattern, a new duvet cover that came with 2 pillow cases, a new fleece blanket in a lovely teal color, and a new body pillow with a fun pop of yellow.  I think the new lamps are much more substantial now, and they look great with the new gray and sheer white drapes.

Overall, very successful start on the bedroom makeover.  I still want to paint the walls in a nice light gray/white-ish color.  And we still need new carpet.  But I think its a good step in the right direction :-)

Cheap and Easy Upgrade

Happy Monday! Wait, is there such a thing?  Can Mondays be happy?  Not sure if I've experience that one yet!  But nonetheless, I have a cheap and easy upgrade to show you that I completed this weekend.

Remember the upcycled toilet paper roll wall art project that I showed you a while back?

Well it was looking a little sad up there on the big wall all by itself.


So last week I went to goodwill and picked up a nearly brand new oak frame for $3.99!  Score!  So I got some gray spray paint at WalMart and went to town.  I took off the backing of the frame, and removed the glass since I wouldn't need it anyways.  I gave the frame a couple of coats and let it dry over night.

Then for an extra special touch and a pop of color to match the wall art, I added some of these felt flowers from a previous craft night.  A couple dabs of hot glue later, and here is my new wall art!


Now it doesn't look so sad up there on the wall by itself.  It also matches really well with the new color theme I am in the middle of switching my house to.  Stayed tuned for a bedroom overhaul update! What have you all been up to?  Any upcycled or spray painted crafts?

And don't forget to follow me for a chance at the 50 Followers Giveaway!

Thursday, February 16, 2012

Hodge Podge of Updates

Last night I had my first taste of Cross Fit.  And holy smokes is it intense!  It taught me a few things…
  1.     .   I’m wayyyy out of shape.  I did modified easy version of what the rest of the class did and my legs still feel like jello this morning!
  2.      .  Sometimes Usually it feels good to get a good butt-kicking work out
  3.      .  I want to go back for more!


I have to wait until the first week of March to take their on-ramp classes.  But I am so excited to start and get this booty of mine in shape! 

In other news, don’t forget to follow me for a chance at my 50 followers Giveaway!


And last but not least, don’t forget to Link Up for Crafty Scrappy Happy’s 1 Year Blogiversary Mega Link Party!


Feel free to link up anything and everything Crafty, Scrappy and/or Happy!  
No giveaways or etsy shops please.
Check out other links, be inspired and make some new friends!
Grab a button if you would!
And check Crafty Scrappy Happy for features all next week!!!!


Photobucket


Wednesday, February 15, 2012

Simple Pillow Case Tutorial

Hello blogland! Over the weekend I made a few new pillow covers for the couch pillows we keep downstairs in the den/living room/family room/whateveryoucallit room.  I've probably mentioned this before, but I've decided to start changing up the color scheme in this house hold.

I blame Pinterest.

Our current colors are reds, browns, beige, and sage green.  However, I've decided I want to switch things up in here.  I'm going for more of the whites, beiges, teals, greens, blues...can ya dig it?? Yes, I’m trying to bring back sayings from previous decades…who’s with me?

Ok, anyways, on to the pillow cover.  I got the original idea from Thrifty and Chic.  You should check out her site, she’s got an amazing eye for design and is so incredibly resourceful! 

Here we go.  Materials you’ll need:

Fabric

No, seriously, other than a sewing machine, that is all you will need.  You’ll need fabric that is about 2 inches wider than the pillow you are covering, and about 2.5 times longer.  Here is the piece I started with.

I believe I got 2.25 yards of each type of fabric I was using, and that was enough to cover 4 of my pillows. 

Step 1: Lay the fabric out face down.

Step 2: Fold up the edge along the short sides about a half inch to an inch. 

Step 3:  Sew those edges

Step 4:  Lay the fabric out face up and place the pillow on top


Step 5:  Fold the bottom half of the fabric up over the pillow and put a pin about where that bottom crease should be

Step 6: Remove the pillow, and fold down the top to where it is over lapping the bottom half by about an inch and a half.  Then lay the pillow back on top to make sure that it will still fit after you’ve sewn it.  Just a note to remember, pillows squish, so if it looks like it’ll be a bit of a tight fit, that’s ok.  It just means that you won’t have a bunch of excess fabric around the edges.

Step 7:  Sew the sides of the pillow case shut.  I only sewed on the left and right sides.  You can sew all the way around if you want, but it’s not necessary.

Step 8: Turn right side in and stuff that pillow inside!  Feel free to do a top stitch here if you want to add a little border.  I didn’t on these, but I may on future covers.

Simple right?  Great way to totally transform the look of some tired old pillows. 

Don’t forget to link up with Jaime over at Crafty Scrappy Happy for her HUGE 1 Year Blogiversary Link Party!!  See my previous post J 

Happy Sewing!

Co-Host!

Hi All!  I am thrilled to be able to be a part of the 1 year blogiversary for Jaime over at Crafty Scrappy Happy!  It’s one HUGE link party so join in on the fun!!  Check out her site, and any of the other co-host sites J  And check back here later today for an easy peasy pillow cover!


Feel free to link up anything and everything Crafty, Scrappy and/or Happy!  
No giveaways or etsy shops please.
Check out other links, be inspired and make some new friends!
Grab a button if you would!
And check Crafty Scrappy Happy for features all next week!!!!


Photobucket


Tuesday, February 14, 2012

Happy Valentine's Day & Happy Birthday!

Today is a very special day.  Not only is it Valentine's Day, but it is my big sister's birthday!  Happy Birthday Heather!!  I love you and you are the best big sister a girl could ever hope for :-)  Here is some birthday bling for you!


And on the Valentine's day side of things, tonight I will be attempting to make lasagna for my special Valentine.  And tomorrow night he will be making me breakfast for dinner, complete with Cream of Wheat (I’m a southern girl at heart still)! 

This weekend we plan to go see This Means War.  Since V-day is in the middle of the week, we decided to wait till the weekend to go out to celebrate. 


On another note, this has been a very exciting week for me so far!  About a week ago, I purchased the Family Household Binder combo pack from Jen over at I Heart Organizing.  She has this crazy cool Etsy shop with all sorts of customizable printables.  It makes it so much fun to stay organized!  I just finished printing and putting together our Barker Household binder last night and I’m really excited to fill it all out.  I’m crazy I know…my husband tells me I get excited by the weirdest things…it could be worse though, right?  Getting excited about being organized isn’t a bad thing, weird maybe, but not bad.

The second great thing so far this week is that I am going to be a Co-Host for Jaime over at Crafty Scrappy Happy!  I will be one of 20 or so blogs helping her celebrate her one year Blogiversary by co-hosting a link party with her!  The link party will start tomorrow night so be sure to check back and check out her awesome blog! 

Thank you all so much for reading, and I hope you have a fantabulous (yep, I just created a word) Valentine’s Day!!

Monday, February 13, 2012

Lined Zipper Pouch Tutorial

I was a busy sewing bee over the weekend.  I finished all of the pouches that I wanted to make for my sister.  Just as a refresher, she’s a makeup guru and therefore has many different lipsticks/glosses/liners and what not.  And she wanted a fun way to organize them and make it easy for her to just grab the colors she needed instead of having to sort through everything.  So she gave me the list of color families that she wanted them all organized into, and I got to work. 

Now, while I tried to take as many helpful pictures as I could, this may still be a tad confusing if you’re brand new to sewing.  If that is the case, you can refer to this blog which is where I got the original idea. 

I apologize for picking the one color which is probably the hardest to tell the difference in the outer material vs. the liner material…didn’t really think that one through.  But hopefully this gives you enough of a starting point!

Ok, let’s get started.  Here’s what you will need:

  • 1 quarter yard of fabric for the outside material
  • 1 quarter yard of fabric for the liner material (I got the little quarter pieces that Joann’s sells for 2 bucks.
  • 1 All purpose zipper – mine was 7 inches but you can get one however long you want.  Just make sure your fabric is at least as long as the zipper.


Step 1: Cut out two squares/rectangles of liner, and two squares/rectangles of outer material.  Make sure they are all roughly the same size.  And make sure that the width is at least as long as your zipper.

Step 2:  Lay down one piece of the liner material face up.  Then line up the top of the zipper with the top of the material.  Then lay a piece of the outer material on top (tops lined up) face down.


Step 3:  Pin and sew

Step 4:  Open up the material so that the right sides are facing out.  Repeat steps 2 and 3 with the other two pieces of fabric on the other side of the zipper.  Making sure that the liner material is on the bottom face up, and the outer material is on top, face down (right sides together).

Once you open it up, it should look like this

Step 5:  now you will put both pieces of the outer material on one side, and both pieces of the liner material on the other.  The zipper should be hidden on the inside. NOTE: Make sure the zipper is at least half way open so that you can turn the pouch right side in when you’re done.


Step 6:  Sew all the way around making sure to leave a few inches open at the bottom of the liner material

Step 7: Reach through the opening you left, all the way to the other side, and turn your pouch right side in. 

Step 8:  Stitch closed the opening that was left on the bottom of the liner.  It’s ok if this is slightly visible since it will be tucked inside the outer material.

Step 9:  Stuff the liner back inside the outer material, and now you have a lined zipper pouch!

Hopefully I didn’t confuse you too much, and the pictures helped!  Feel free to leave comments and ask questions!  Stay tuned for an easy pillow cover tutorial!

And don’t forget to follow me for a chance to win the Giveaway!

Friday, February 10, 2012

High Five for Friday!

Happy Friday everyone!  Don't forget to become a follower of this blog so that you can have a chance at the fabulous giveaway!


Today I am linking up with Lauren over at From My Grey Desk      From My Grey Desk  for the top 5 things from this week.

1) Deciding to host my very first giveaway!  I'm excited if you couldn't tell...

2) My new blog design/background.  Courtesy of Cutest Blog on the Block. 

3) The Wii Fit that is supposed to be delivered today (my V-day present from the hubs)  I can't wait to start trying some workouts, especially yoga!


4) Going to Lumber Liquidators after work yesterday.  This means we are one step closer to getting new floors!

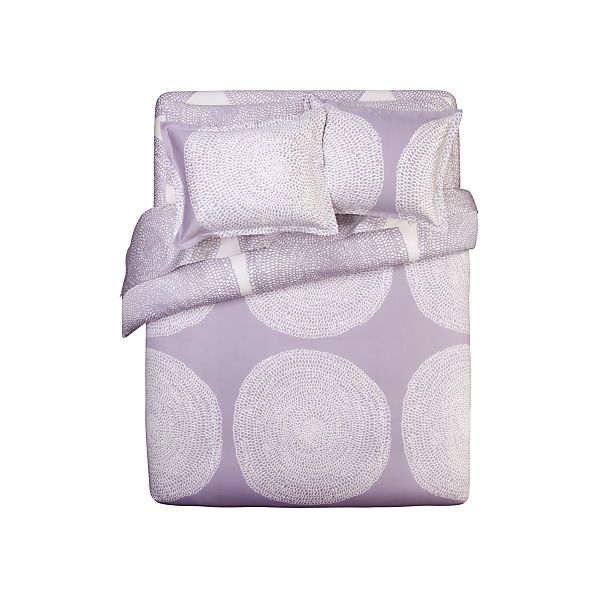
5) This Bedding from Crate and Barrel.  I might have to find a way to buy it...


What are you loving this week?